Access your kubernetes cluster from your local machine with tailscale
Tailscale
We will install tailscale to create a VPN between the control plane and our machine.
Let’s first install tailscale on both control plane and our computer.
These steps are for ubuntu, for other os you can refer to the official documentation.
# Add package signing key & repo
curl -fsSL https://pkgs.tailscale.com/stable/ubuntu/focal.noarmor.gpg | sudo tee /usr/share/keyrings/tailscale-archive-keyring.gpg >/dev/null
curl -fsSL https://pkgs.tailscale.com/stable/ubuntu/focal.tailscale-keyring.list | sudo tee /etc/apt/sources.list.d/tailscale.list
# Install tailscale
sudo apt-get update
sudo apt-get install tailscale
Now we need to authenticate and connect the machine to our tailscale network.
sudo tailscale up
From the tailscale’s admin console, you can disable the key expiration if you don’t want/can’t connect each time to re-authenticate.
The installation needs to be done on the control plane and your machine.
Connectivity
Let’s open the connectivity on the firewall on Oracle Cloud.
First we need to retrieve our machine’s IP address inside tailscale network.
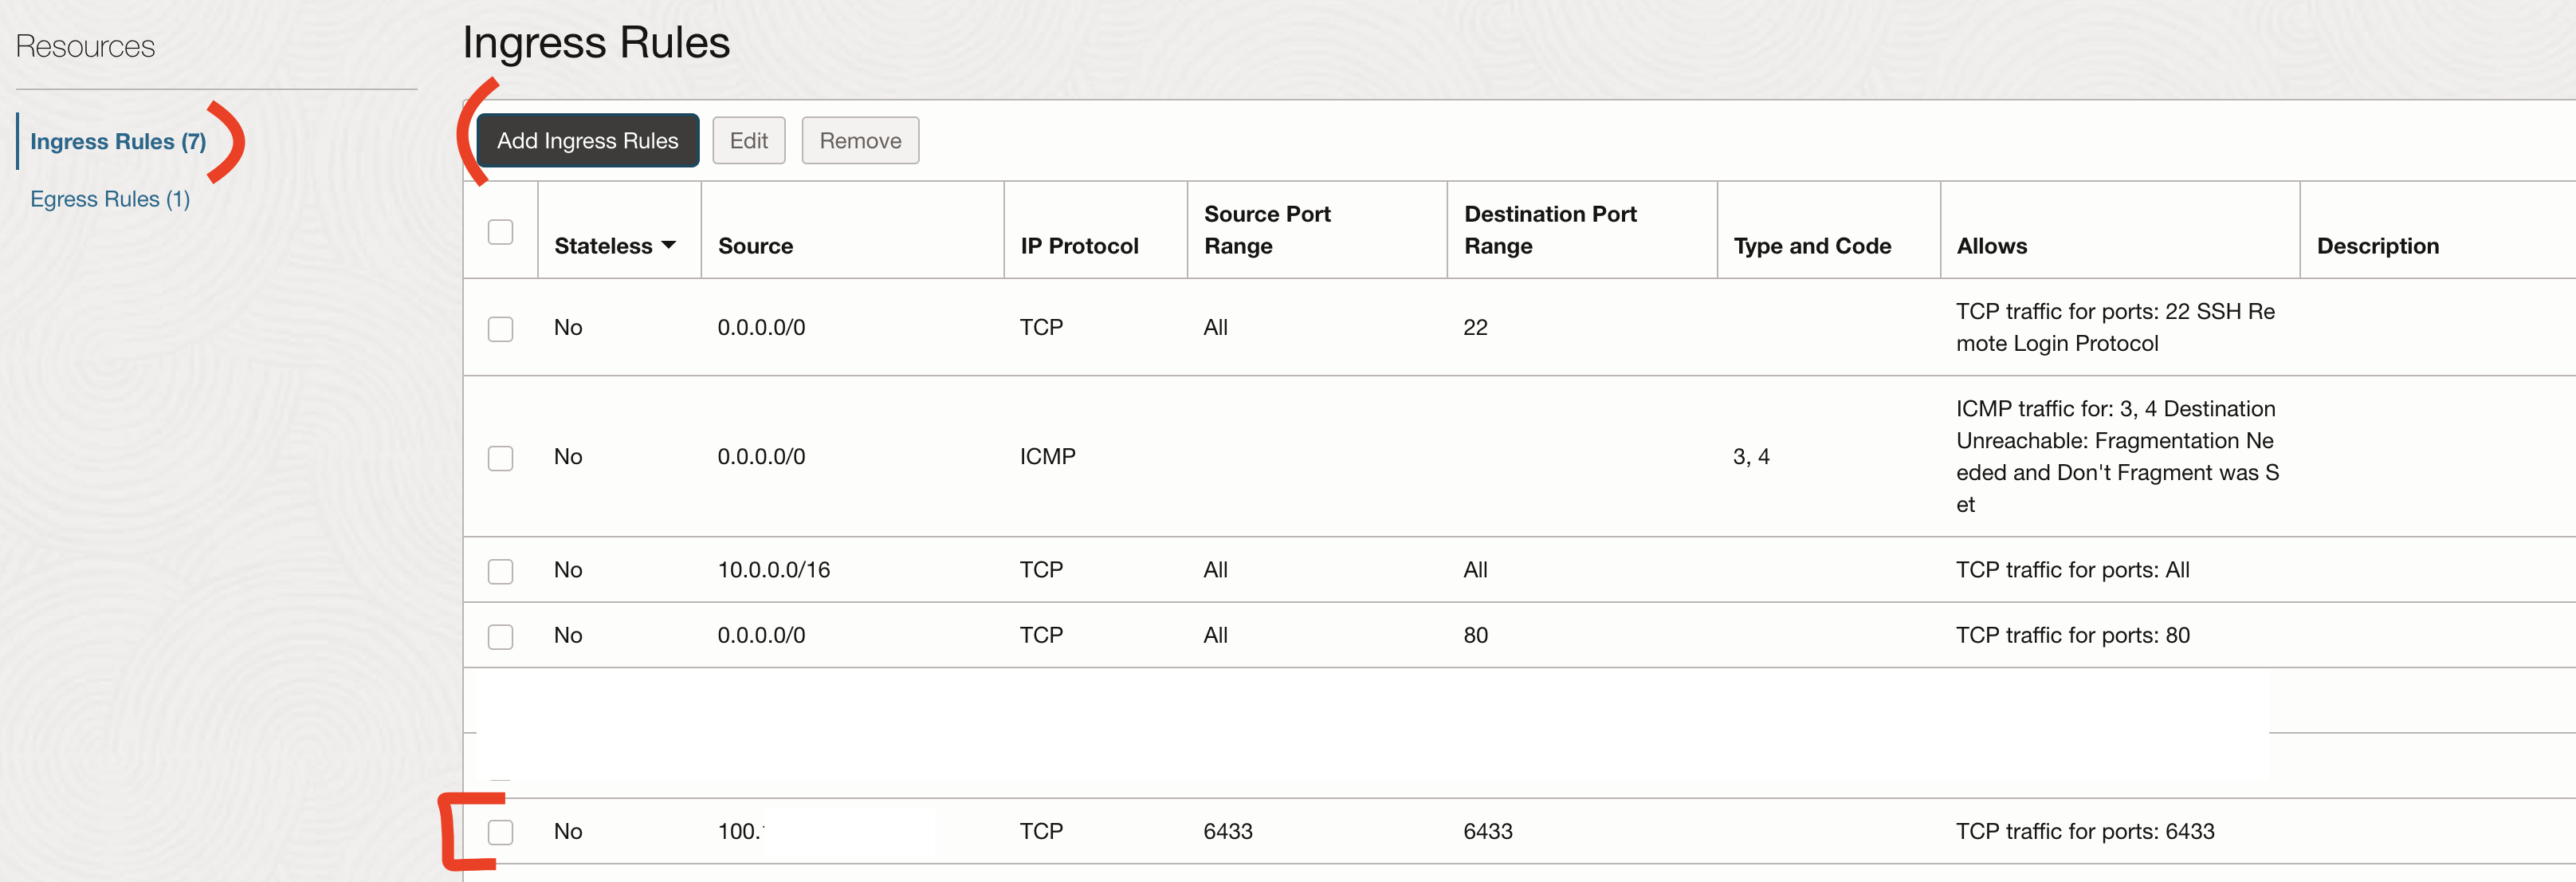
We will open the port TCP 6433 in source and destination for our machine only.
Run the following command on your machine.
tailscale ip -4
100.X.Y.Z
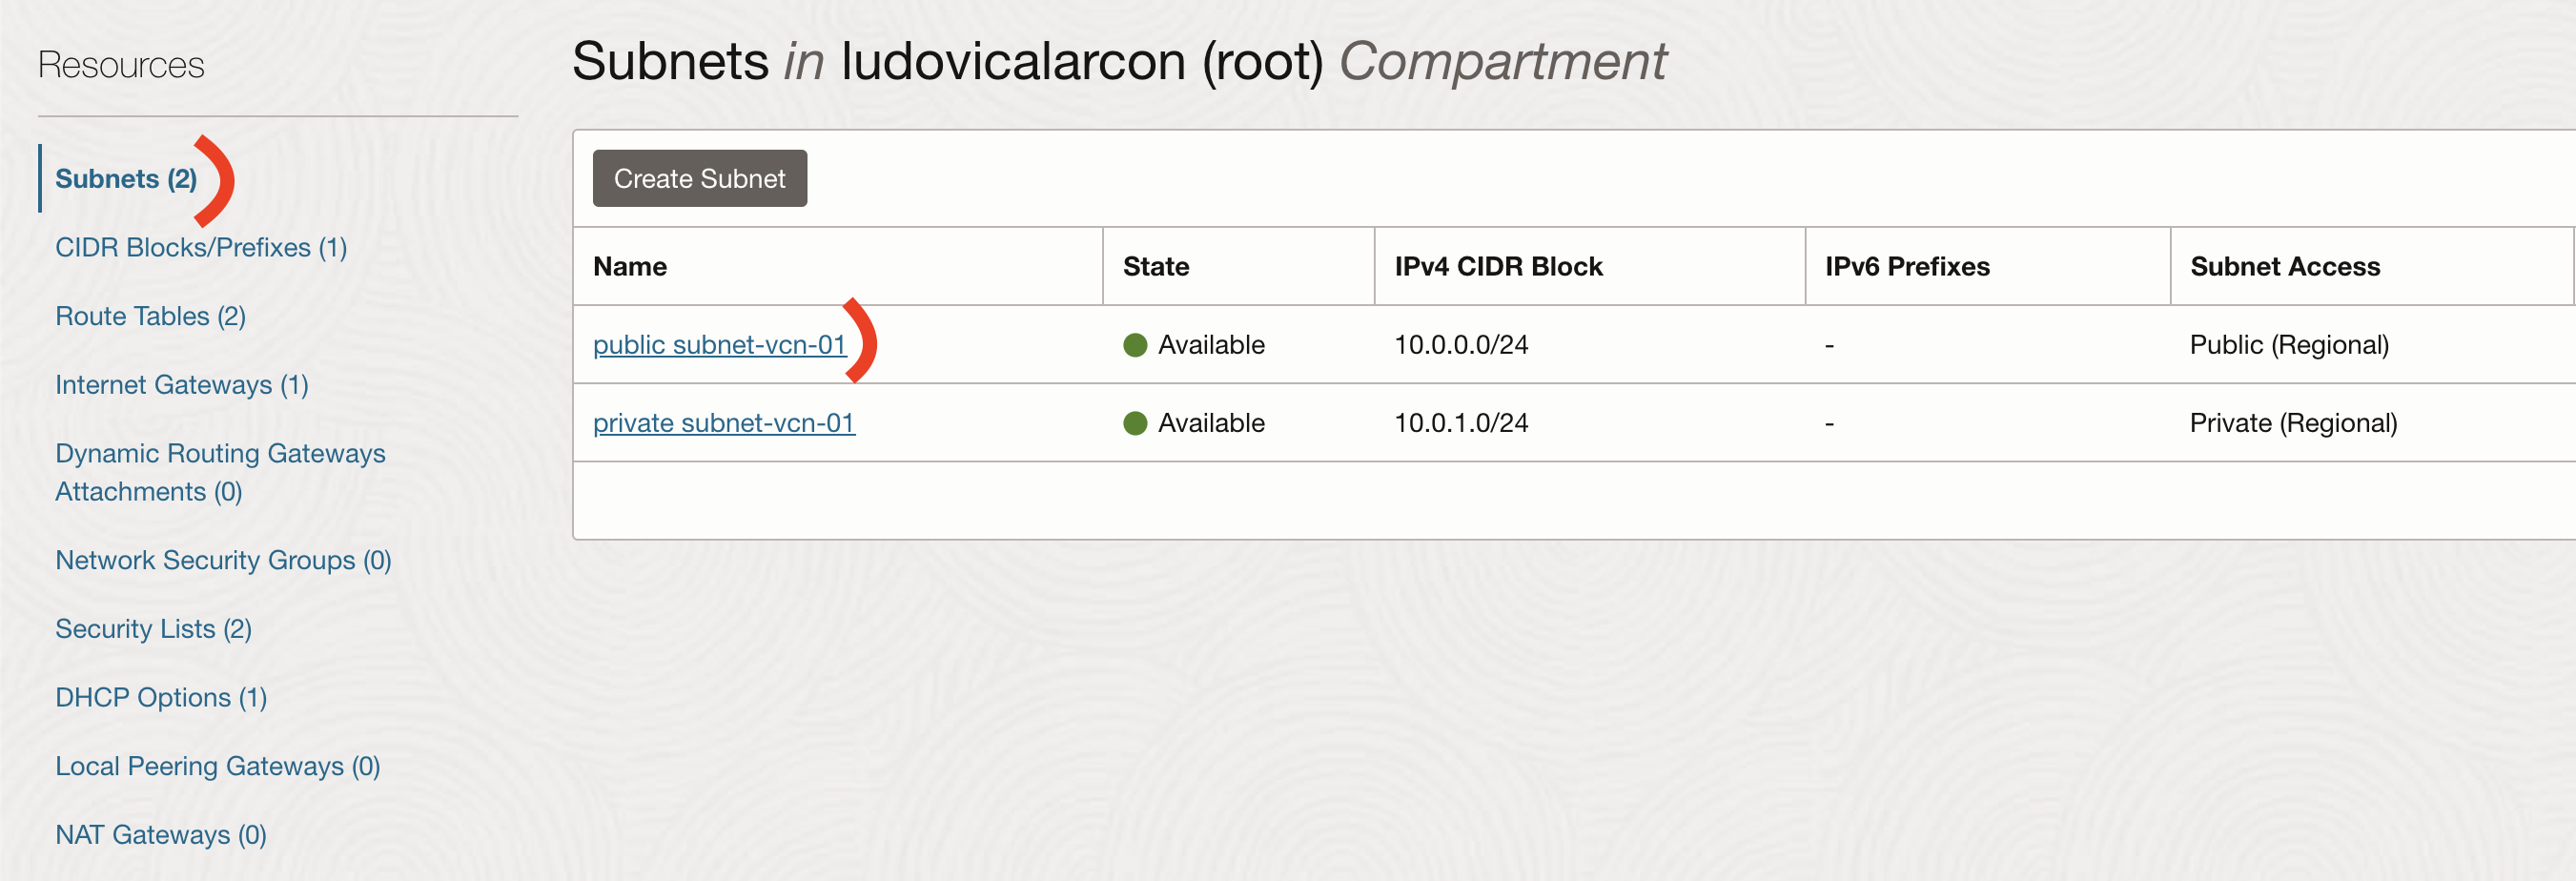
On the Oracle Cloud portail, go to Networking -> Virtual Cloud Networks -> your VCN -> Subnets -> public-subnet
Then go to Security Lists -> Default Security List
Adn finally to Ingress Rules -> Add Ingress Rules
KubeConfig
We need to ssh into the control plane in order to retrieve the KubeConfig file located in .kube/config.
But first we need to retrieve the tailscale’s IP address of the control plane.
tailscale ip -4
100.X.Y.Z
We will create a KubeConfig file on our machine and put the content inside and replace the line server: https://10.0.0.X:6443 with the IP address previously retrieved.
# On the local machine
mkdir -p ~/.kube
# Put content retrieve on the control plane
vi ~/.kube/oracle-config
# Use the kubeconfig
export KUBECONFIG=~/.kube/oracle-config
If we try to interact with our cluster from our local machine, we will now have an error on the certificate.
Unable to connect to the server: tls: failed to verify certificate: x509: certificate is valid for 10.0.0.W, not 100.X.Y.Z
Add SAN to the certificate
We will need to add the IP address to the SAN of the certificate.
To do so, we will first remove the certificates of the API server, so we can regenerate them.
sudo rm /etc/kubernetes/pki/apiserver.{crt,key}
Then, we need to retrieve our kubeadm configuration file
kubectl -n kube-system get configmap kubeadm-config -o jsonpath='{.data.ClusterConfiguration}' > kubeadm.yaml
Now, we can modify our configuration file to add the SAN.
Replace with your own IP addresses.
apiServer:
  certSANs:
    - "PRIVATE_IP_ADDR_OF_CONTROLPLANE"
    - "kubernetes.default"
    - "TAILSCALE_IP_ADDR_OF_CONTROLPLANE"
  extraArgs:
    authorization-mode: Node,RBAC
  timeoutForControlPlane: 4m0s
apiVersion: kubeadm.k8s.io/v1beta3
certificatesDir: /etc/kubernetes/pki
clusterName: kubernetes
...
...
...
Finally, we can generate the new certificates for the API server.
sudo kubeadm init phase certs apiserver --config kubeadm.yaml
Conclusion
We are now able to interact with our kubernetes cluster from our local machine.
I hope this was useful!


